Cauliflower Romesco (Mark Bitman)

Is it weird to call something a good substitute for pizza? That’s what this seems like and I love it.

INGREDIENTS

  •  1 1/2 pounds cauliflower, separated into large florets
  • 3 tablespoons olive oil
  • 1/2 teaspoon salt
  • 1/4 teaspoon pepper
  • 1 pound Roma tomatoes, halved
  • 1/2 cup almonds
  • 2 tablespoons chopped garlic
  • 1 tablespoon sherry or red wine vinegar, or more to taste
  • 1/4 cup chopped fresh parsley

DIRECTIONS

  1. Heat the oven to 450°F. Put the cauliflower in a roasting pan or rimmed baking sheet, drizzle with 1 tablespoon oil, sprinkle with half the salt and pepper, and toss to distribute. Put the tomatoes, almonds, and garlic in another pan and repeat with the remaining 2 tablespoons oil, 1/4 teaspoon salt and 1/8 teaspoon pepper.
  2. Transfer both pans to the oven and roast, stirring once or twice, until the vegetables are tender and charred in places. The tomato mixture will be ready first, in 5 to 10 minutes; transfer it and any juices to a blender or food processor. Leave the cauliflower in the oven until it’s tender, another 15 to 20 minutes.
  3. Add the vinegar to the blender with the tomatoes, and pulse until the sauce is as course or as smooth as you like; to thin it, add water, 1 tablespoon at a time as you work. Transfer the romesco to a small pot to warm over medium heat if you’d like. Taste and adjust the seasoning, spoon over the cauliflower, garnish and serve.
Cauliflower Romesco (Mark Bitman)

Oven-baked. Spiced. Salmon. Skewers.


salmonskewers1Salmon night is always a night to look forward to. These flavor nuggets are so easy to prepare and, as my friend opened my eyes to, don’t need to be grilled like Bon Appetit’s recipe says. Mind. Blown! Usually I disregard any recipes that call for a grill because I am terrible at cooking over coals. The science behind it just doesn’t make any sense. Heat coals until their grey and then hope they retain enough heat to cook food thoroughly? Every time I use my tiny Weber grill I worry that I’ll have food poisoning the next day because the whole time the chicken was on the grill the coals are dying. That’s no way to eat! So now I use my oven and it makes life, and this recipe, so much easier.

The original recipe says to soak the skewers in water for an hour so they don’t burn over coals, but cooking these in the oven doesn’t require that part. In the amount of time it takes to heat your oven, you’ve got plenty of time to fully prep the skewers. Unless you forget to buy lemons and have to run back to the store so you can make this meal for your boyfriend’s parents who are visiting from out of town. That was fun. “Oh, yes, I love to cook! Oh, you’re going to love this recipe, David does; I make it all of the time! Oh, you want to eat soon, I’ll get started now so we can eat in 20 minutes!” <Face palm> “I mean…we’ll eat in an hour. I forgot to buy lemons…the only other actual ingredient to this recipe that isn’t readily found in my spice drawer.” Apparently I was at the grocery store earlier in the day thinking “for salmon skewers I have salmon and I have skewers, so I’m awesome.” Rookie move.

Lesson Learnt: Don’t assume you know a recipe by heart. Just. Double. Check.

At least once we finally did eat, everyone agreed that it truly was a delicious recipe and that lemons were worth waiting for. Ok, on to the recipe.


salmonskewers

Oven-baked Spiced Salmon Skewers

Adapted from Bon Appetit’s Spiced Salmon Kebabs

INGREDIENTS

  • 2 tablespoons dried fresh oregano
  • 2 teaspoons sesame seeds
  • 1 teaspoon ground cumin
  • 1 teaspoon kosher salt
  • 1/4 teaspoon crushed red pepper flakes
  • 1 1/2 pounds skinless salmon fillet (preferably wild), cut into 1-inch pieces
  • 2 lemons, very thinly sliced into rounds
  • 2 tablespoons olive oil
  • 8 bamboo skewers

DIRECTIONS

  1. Heat oven to 350°F. Mix oregano, sesame seeds, cumin, salt, and red pepper flakes in a small bowl to combine.
  2. Using your hands, coat salmon pieces in olive oil, and in a bowl, or on your cutting board, toss with the spice mixture. (I did this before skewering to make sure the seasonings stuck to the fish and didn’t mostly end up on the pan below, which is what, frustratingly, happened the first time I made this)
  3. Beginning and ending with salmon, thread salmon and folded lemon slices onto 8 pairs of parallel skewers to make 8 kebabs total.
  4. Set skewers across the rim of the short end of a casserole dish so the fish are hovering above (not sitting on) the dish below.
  5. Bake for 15 minutes until the fish is opaque throughout.


Oven-baked. Spiced. Salmon. Skewers.

Fried Eggs, Sauteed Veggies, Garlic Naan

eggs

Breakfast, lunch or dinner: I love this meal. I never thought about putting all these items together until my friend made it for us years ago and it’s been a regular in my meal rotation ever since. Why is it so good? Because it’s like a deconstructed, dairy-free eggs florentine that makes you feel like you should be drinking mimosas while watching passersby at a chic brunch spot—but it won’t put you in a food coma because the heaviness is in the good-for-you veggies.

Another winning quality of this meal is the preparation. It’s so stinkin’ easy. I’ve grown to love layering after destroying so many omelettes. Is it because I am too impatient to let the eggs cook through? Is my flipping game is weak? Should I have cooked the eggs longer before putting the veggies in? IDK. I gave up. Omelettes are a nightmare and cover up all the pretty veggies anyway.  If I’ma eat healthy, I want the world to see. Witness me!

eggs

INGREDIENTS

  • 2 Tablespoons olive oil, divided
  • 2 eggs
  • 1/4 piece of garlic naan
  • 1/4 of a shallot, sliced (can also sub 2 Tbsp onions if you don’t have shallots)
  • 1/4 of a red/yellow/orange pepper, sliced
  • 2-3 leaves swiss chard, roughly chopped
  • handful of cherry tomatoes, sliced
  • salt & pepper
  • Sriracha

DIRECTIONS

  1. Before you gather all your ingredients, crank up your oven to 350°F. Gather your eggs, chard, sweet peppers, tomatoes, & shallots. As you warm up 1 Tablespoon of olive oil on medium heat, lop off a few thin rings of shallots—no need to dice and waste time. By the time you’ve got the amount you want and toss them in the pan, the oil will be the right temp to give you a lil’ sizzle greeting. Yes, I’m happy to be here, too, oil!
  2. As the shallots start to brown, slice your sweet peppers. But don’t neglect the shallots! Slice 3 pepper rings, flip the shallots. Slice 3 more pepper rings, flip dem shallots. By now you should have a good start on a lovely caramelization, so toss in the sweet peppers. While those start to cook, chop up the chard leaves (I cut out the stems because they take too long to cook for this meal). Again, keep an eye on your pepper party. Once the peppers start to look pliable, toss in the chard, add 1 Tablespoon of water to help wilt the chard, and salt and pepper to taste. Go back to your cutting board, quickly slice the tomatoes in half (or more if they feel big) and add them to the pan when the chard has reduced in size. Once the tomato skins look wrinkled, it’s time to put that goodness on a plate.
  3. Now’s the time to put the naan in the oven to toast. As it’s toasting, add the remaining 1 Tablespoon olive oil to the pan. Keeping the heat on medium, crack two eggs into the pan and salt and pepper to taste. Let cook for 1 minute uncovered, then cover for another minute so the whites cook through, but the yolks stay nice and runny. When the eggs are done, so is the naan!
  4. Plate all three items together, top with Sriracha and serve.
Fried Eggs, Sauteed Veggies, Garlic Naan

Vietnamese Pork Loin

porkLoin_2

While perusing a book store, I came upon David Tannis’ cookbook One Good Dish. Flipping through a couple pages it seemed like a lot of the recipes were really straight forward: have a base vegetable or meat, add herbs, cook. Serve with a glass of wine, high five yourself for preparing an amazing meal and leave the cleanup for someone else!

Because I’ve become so smitten with this guy’s recipes, I ventured over to his Recipe Book featured in the NYT and was immediately drawn to the Vietnamese Braised Pork Ribs mostly for the fact that he braised them in the oven instead of cooking them on a grill. Being grill-less myself, I’ve actually had really good luck making oven-baked ribs in the past and seeing that this was just a different take on a meat rub, I figured I could easily make this dish without screwing it up.

Then I went to the grocery store and found out that they only had frozen baby back ribs (my and my boyfriend’s favorite) or thawed St Louis Style ribs (not our favorite) and both were still $18 for a rack. Jesus, no! Apparently I’m used to going to the grocery store when those bad boys are on sale or I get them for cheaper at Aldi’s because I wasn’t going to spend $20 on ribs that weren’t smoked for 4 hours and served to me after 20 minutes of putting my order in.

So I decided a marinade’s a marinade, and that the $10 hunk of pork loin would sub in just fine. Right? The recipe calls for 3-4 lbs of ribs, and I had 2 lbs of pork loin, so I’d just half the recipe and cook it like any other pork loin. After slathering on the marinade and popping it back in the fridge to soak, however, I started to worry that my math wasn’t really accurate. Sure 2 lbs is half of 4 lbs, but pork loin is solid meat. Ribs are at least half bones. Maybe I shouldn’t have halved the recipe? Ungh, I didn’t feel like making MORE marinade, so I just assumed it’d be fine and hoped for the best.

In the end, I think what saved my butt was that I left the meat in the fridge over night instead of cooking it after 2 hours because it. turned out. delicious!

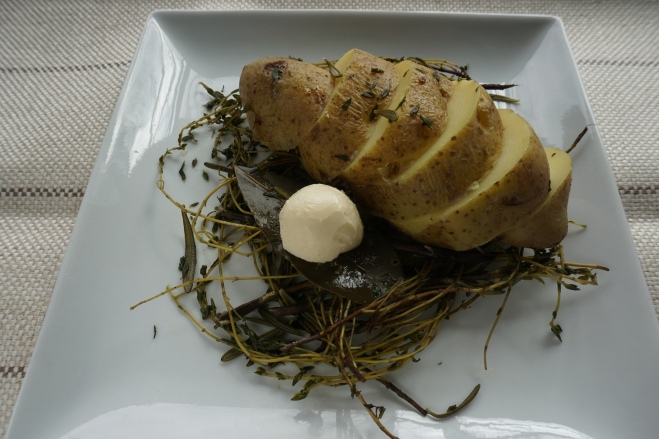
Can you seeeeeee the deliciousness?

porkLoin_1

I’m so excited for leftovers 🙂


Vietnamese Pork Loin

Adapted from David Tannis’ Vietnamese Braised Pork Ribs recipe, New York Times Cooking Recipe Box

INGREDIENTS

  • medium shallot, finely chopped
  • tablespoon lemongrass paste 
  • tablespoon soy sauce
  • 1/2 tablespoon fish sauce (such as Red Boat)
  • 1/2 tablespoon hot chile paste (such as sambal oelek)
  • teaspoon kosher salt
  • tablespoon brown sugar
  • teaspoon Chinese five-spice powder
  • 1/2 tablespoon grated garlic
  • tablespoon finely chopped or grated ginger
  • 2 pounds pork loin
  • scallions, slivered or chopped, for garnish
  • Cilantro and mint sprigs, for garnish

PREPARATION

  1. Make the marinade: In a small bowl, put the shallots, lemongrass, soy sauce, fish sauce, chile paste, salt, sugar, five-spice powder, garlic and ginger. Mix well.
  2. Put the meat in a deep baking dish or roasting pan and add marinade. Using your hands, coat pork loin well. Let marinate overnight in the refrigerator, well wrapped. 
  3. Preheat oven to $450°F and coat an ovenproof skillet with oil.
  4. Over medium-high heat, sear the tenderloin so that it browns all sides.
  5. Place seared tenderloin on foil-lined baking sheet and roast in the oven for 30-40 minutes, until the internal temperature reads 145°F.
  6. Once out of the oven, let rest for at least 5 minutes before serving.


Vietnamese Pork Loin

A Nest of Aromatic Potatoes

aromaticPotatoes

How clever it is to infuse potatoes with flavor while they’re cooking! This is another wonderful find in David Tannis’ One Good Dish Cookbook. As I was making the pork loin I decided that even if David’s advice was to go the authentic route and pair my Vietnamese “not-ribs” with rice, I had a big ol’ bowl full of potatoes that needed to be used, so I went the typical “meat & potatoes” route instead. And whether or not the two flavors truly went together, I don’t have that discerning of a palette to understand the faux pas, and therefore deemed it a-ok to do for a weekday meal.

I have to say, though, with the amount of herbs this book requires in each dish, I think I have to double the size of my herb garden this year! C’mon, Spring!

Steamed New Potatoes with Aromatics

From One Good Dish, by David Tannis

Ingredients

  • 2 pounds new potatoes, 1 1/2 to 2 inches
  • 1 small bunch of thyme
  • a few rosemary sprigs
  • 4 bay leaves
  • 1/4 teaspoon black peppercorns
  • 1 head garlic, separated into cloves but not peeled
  • salt

Directions

  1. Scrub the potatoes but do not peel.
  2. Put the thyme, rosemary, bay leaves, peppercorns, and garlic cloves in a wide heavy pot.
  3. Add the potatoes in one layer and enough water to barely cover.
  4. Sprinkle with 2 teaspoons of salt.
  5. Put on lid and bring to a hard boil.
  6. Reduce the heat slightly to maintain a rapid simmer and cook, covered, for about 15 minutes.
  7. Check the potatoes to with a skewer to make sure they have cooked through.
  8. Turn off the heat and leave the potatoes for at least 10 minutes, or up to 30 minutes. (Because my potatoes were bigger (2-3 inches in size), I left my potatoes in for 20 minutes & they turned out great)
  9. To serve, drain the potatoes and put them in a serving bowl, with the aromatics still clinging to them.

//You can also pull the aromatics out of the pot, shape them into little nests on individual plates and place the potatoes on top. Serve with a dollop of butter alongside the potatoes on a cooled bay leaf and you’ve created a lovely rustic presentation!

DSC00906


A Nest of Aromatic Potatoes

Rosemary Garlic Butter

Rosemary Garlic Butter

This was the first year I actually acted on my desire to learn how to garden. I figured I’d start off easy with an herb container garden. While at the nursery I picked out all the herbs I wanted to grow (mint, chives, basil, thyme, rosemary, cilantro & dill) and told myself “yeah, growing 7 types of herbs you’ve never dealt with before is a GREAT way to start off easy!” Immediately after coming home I was emailing my sister with another question about gardening. I mean, in theory, container gardening seems easy, but then there were all these worries that I was overwatering or I wasn’t clipping them right—should I even be clipping them at all a week after I planted them? Oh, it was nerve-wracking, so I signed myself up for an herb gardening class through the St Louis Community College Continuing Education program. It was so helpful to learn how to maintain these herbs to get the best growth and flavors out of them.

Anyway, having recently taken the class, when David came home with a couple steaks to cook, my mind immediately went back to the herb compound butters we discussed in the usage portion of the class. Man, my mouth started to water. I quickly googled “herb compound butter” and found this simple Betty Crocker recipe. I don’t grow oregano in my garden, so I just subbed in some thyme, because I figured that herb would still be found in an Italian seasonings spice mix, and it still turned out delicious!

I didn’t want to create an entire log for just the two of us, so I just took out a couple tablespoons of butter and mixed in some herbs. And boom. Delicious. Chalk this recipe up as a win!

RGB2

INGREDIENTS

  • 2 Tablespoons butter
  • 1/4 teaspoon fresh rosemary
  • 1/4 teaspoon fresh chives
  • 1/4 teaspoon fresh thyme
  • 1/2 clove fresh garlic
  • salt and pepper to taste

DIRECTIONS

  1. 1. Rinse and chop all your herbs. Mix together all herbs together with softened butter (basically mash some butter on a plate with a fork for a bit to break it up and get more surface area exposed to room temp. After a few mashes, the butter will be soft enough to toss the herbs on). Salt and pepper to taste.
  2. 2. Form into a pat or use two spoons to shape into a quenelle. Put in the fridge to re-harden for 30 minutes.

// A quenelle? Yeah, I had to look up the term because my mind was stuck on “cannoli,” and I knew that wasn’t the word I was looking for! I’ve only seen chefs make quenelles on cooking shows and think it makes a pretty presentation, so I assumed my way on the presentation, too! You can see from my photos that I didn’t look up how to do it until now because mine just looks like a round football, not a pretty, correctly-formed 3-sided football. Watch what a quenelle should look like and how to make one properly on this video from Fine Cooking. HOORAY, LEARNING! Cheers, y’all. //

Rosemary Garlic Butter